> ## Documentation Index
> Fetch the complete documentation index at: https://docs.blobhub.io/llms.txt
> Use this file to discover all available pages before exploring further.
# Introduction
> Run BlobHub work on your own machine
The **BlobHub Worker** is a standalone process that runs on your machine, authenticates to BlobHub
with an API key, and runs work declared in a local config file. Each entry in the config is a
**section**, and each section has a **`job_type`** that decides how the worker handles it.
The worker introduces **no new BlobHub backend endpoints** — every job type speaks the existing
BlobHub REST and WebSocket APIs as the user whose API key the worker carries.
## Install
```bash theme={null}
pipx install blobhub-worker
```
Requires Python 3.12+.
To upgrade later:
```bash theme={null}
pipx upgrade blobhub-worker
```
## Quickstart
```bash theme={null}
# 1. Store credentials and validate your identity against /v1/users/me.
blobhub-worker login
# 2. Edit your config to declare one or more sections.
$EDITOR ~/.blobhub-worker/config.yaml
# 3. Run the worker (headless or with the live dashboard).
blobhub-worker start --tui
```
The minimum config is one section that declares a `name` and a `job_type`, plus whatever
fields that job type requires. The [Configuration](/worker/configuration) page is the complete
`config.yaml` reference.
## The live dashboard
Run `blobhub-worker start --tui` for a live, read-only view of every section and thread. The dashboard
reflects what the worker is doing — you drive threads from the BlobHub web UI, not from here.
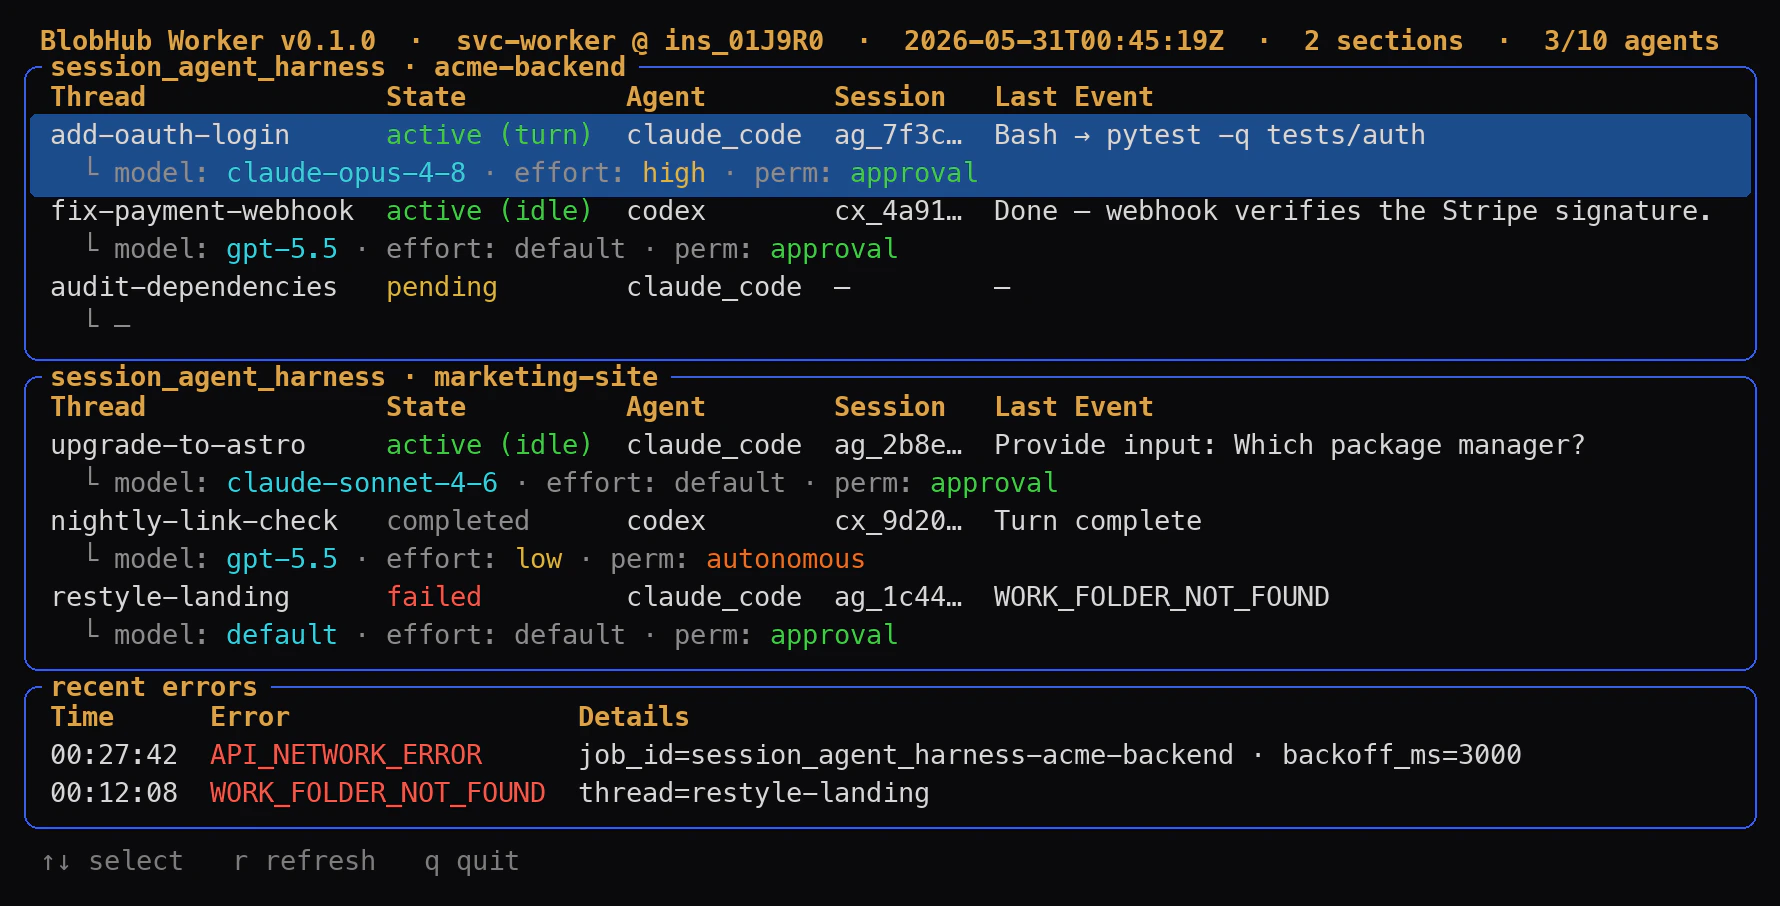 * The **header** shows the worker version, the user it acts as, the instance id, the clock, and how
many agent slots are busy (`3/10 agents`).
* Each **section** is its own panel titled `session_agent_harness · `, listing its threads with
`State`, `Agent`, the resumable `Session` id, and the `Last Event`. The `└` line shows the resolved
`model · effort · perm`; the selected thread is highlighted.
* **State** is color-coded live: `active (turn)` / `active (idle)` green, `pending` yellow,
`completed` dim, `failed` red.
* **recent errors** collects the latest warnings and failures. Press `q` for a graceful shutdown.
## What's in this section
The pages in **Overview** describe the worker as a product, independent of any specific job type:
* [Concepts](/worker/concepts) — the mental model: process, sections, job types, sessions, threads,
and agents.
* [`blobhub-worker login`](/worker/cli/login), [`blobhub-worker start`](/worker/cli/start) — CLI reference.
* [Configuration](/worker/configuration) — the complete `config.yaml` you write.
* [Reference](/worker/reference) — process-level exit codes and generic limitations.
The **Specification** group documents the worker internals — the on-disk and on-wire data model,
the per-job-type object notation, and the end-to-end workflows. Start at the
[Specification introduction](/worker/specification). It is organized by job type; v1 ships one job
type — [Session Agent Harness](/worker/session-agent-harness/overview).
* The **header** shows the worker version, the user it acts as, the instance id, the clock, and how
many agent slots are busy (`3/10 agents`).
* Each **section** is its own panel titled `session_agent_harness · `, listing its threads with
`State`, `Agent`, the resumable `Session` id, and the `Last Event`. The `└` line shows the resolved
`model · effort · perm`; the selected thread is highlighted.
* **State** is color-coded live: `active (turn)` / `active (idle)` green, `pending` yellow,
`completed` dim, `failed` red.
* **recent errors** collects the latest warnings and failures. Press `q` for a graceful shutdown.
## What's in this section
The pages in **Overview** describe the worker as a product, independent of any specific job type:
* [Concepts](/worker/concepts) — the mental model: process, sections, job types, sessions, threads,
and agents.
* [`blobhub-worker login`](/worker/cli/login), [`blobhub-worker start`](/worker/cli/start) — CLI reference.
* [Configuration](/worker/configuration) — the complete `config.yaml` you write.
* [Reference](/worker/reference) — process-level exit codes and generic limitations.
The **Specification** group documents the worker internals — the on-disk and on-wire data model,
the per-job-type object notation, and the end-to-end workflows. Start at the
[Specification introduction](/worker/specification). It is organized by job type; v1 ships one job
type — [Session Agent Harness](/worker/session-agent-harness/overview).